My Instant Pot Doesn’t Have a Poultry Button
An Instant Pot is an amazing kitchen appliance. It’s a great way to prepare meals in a fraction of the time you’d have used with conventional methods.
One thing I’ve noticed is that not all models have a button for cooking poultry.
This can be frustrating when cooking chicken or turkey because they are delicate and require specific cooking times and pressure settings to avoid over and under-cooking.

What Does the Instant Pot Poultry Setting Do?
The Instant pot poultry setting allows you to cook poultry with a low-pressure setting and longer cooking time.
However, this setting is not available in some versions of the Instant Pot.
The newer models do not have this setting because it has been replaced with other settings that allow you to cook poultry without having to convert your recipe into a pressure-cooking one.
Although the poultry button is convenient, it is general and does not consider the size and the part of the chicken that is being prepared.
You might find that a whole chicken cooks unevenly. Be sure to check the different sections once the poultry setting is complete.
If you find that you often need to increase the cooking time, it might be better to use the manual setting from the get-go.
Which Instant Pot models have the Instant Pot Poultry Button?
The Instant Pots with the poultry button include the Duo model and Duo Nova series. The appliances are in size 6- and 8-quart models.
The newer versions of the pot replaced the Poultry button with ”beans/chili”, “multigrain”, and “steam” which can be used for cooking meat at lower temperatures whilst retaining moisture.
What if your Instant Pot doesn’t have the Poultry Smart Program?
If you’ve just realized this, no need to worry. you can still prepare the delicious chicken by using the manual setting on your Instant Pot.
Let’s look at how you can use an instant pot to cook a few different chicken recipes with ease.
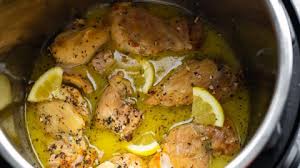
1. Chicken Thighs
You can prepare chicken thighs with or without bone or skin. Thighs with bone and skin at room temperature take about 12 to 15 minutes.
Chicken thighs with bone but without skin take about the same time (12 minutes).
Thighs without bone or skin take a shorter time of 10 minutes.
To cook the chicken, place the pieces into the Instant Pot. The appliance safely accommodates 6 to 8 pieces of chicken.
Next, add 1-4 cups of water or broth so the chicken is covered. For a 6-quart instant pot, use one cup minimum, and 1.5 cups for 8 quart instant pot.
More liquid is only necessary if you’d like some chicken stock. You can also add ingredients such as onions, carrots, garlic, celery, or other vegetables.
Next, seal the instant pot, set the valve, and press the manual button to start pressure cooking.
As you’ve noticed, the cooking times vary with the condition of the chicken thighs. You’ll need slightly more time to prepare a variation of the thighs while frozen.

2. Chicken Breast
An instant pot also works great for chicken breasts.
Just as with the thighs, there are variations in cooking time depending on whether the breast has skin, bone, frozen, or fresh.
Frozen boneless chicken breasts cook for 10 to 12 minutes while fresh takes 8 to 10 minutes in an instant pot.
Another difference is where to place the chicken pieces. When using fresh chicken, place them on the trivet as opposed to directly in the pot.
The procedure to prepare chicken breast is straightforward. Place the breast into the instant pot depending on its state.
You can add salt, spices, or other ingredients of your choice. Then add 1 to 2 cups of water or broth to surround it.
Seal the instant pot and press the manual button for pressure cooking to commence. Wait for your chicken to cook through.
Once the set time has elapsed, let the appliance pressure release for about 5 to 10 minutes.

3. Shredded Chicken
You can use shredded chicken from an instant pot to make tacos, salads, enchiladas, soups, quesadillas, pulled barbecue sandwiches, and more.
Place your chicken breasts into the bottom of your pot, and add in some broth or water (1-2 cups). Next, add your seasonings and pressure cook for 10 minutes.
After it’s done, natural release for 5 minutes and open the instant pot lid.
You can choose to remove the chicken pieces or leave them in the appliance.
Next, shred using a fork. This makes an already easy recipe even easier as you can make this with very little effort.

What If My Instant Pot Doesn’t Have a Soup Button?
The soup button is a newer feature of the pot that allows you to cook soup at a lower pressure and temperature for longer periods depending on the soup type.
If you have an Instant Pot that doesn’t have a Soup button, use the manual setting to cook soup.
There are 3 modes to play around with when preparing soup with an instant pot- normal, less, and more modes.
- The normal mode takes 30 minutes and is recommended for soups with meat.
- Less mode takes 20 minutes for vegetable soup and;
- More mode takes 2 to 4 hours for bone broths.
Fortunately, several instant pots have the soup/broth feature. If you want to skip the hassle of figuring out how to maneuver, consider buying one of these products.
They include:
| Name | Soup | Poultry | Yogurt |
| Instant Pot Duo | ✓ | ✓ | ✓ |
| Instant Pot Duo Plus | ✓ | ✕ | ✓ |
| Instant Pot Pro | ✕ | ✕ | ✓ |
| Instant Pot Star Wars™ | ✓ | ✓ | ✓ |
| Instant Pot Ultra | ✓ | ✕ | ✓ |
| Instant Pot Max | ✓ | ✕ | ✓ |
| Instant Pot NOVA | ✓ | ✓ | ✓ |
| Instant Pot Smart | ✓ | ✕ | ✓ |
How Do I Know If My Instant Pot Has a Yogurt Button?
The new lineup of the Duo Plus, Smart, and Ultra has an additional Yogurt Button that allows you to adjust cooking parameters to make your homemade yogurt recipes.
You can also use the yogurt button to pasteurize milk. The yogurt function is non of the non-pressure cooking settings of an instant pot.
To confirm if your instant pot has this button, go through the buttons and settings. You can quickly check through the buttons using images online or the user manual of a specific Instant Pot.

Here’s a link to How to Make Yoghurt Using an Instant Pot
Instant Pot Settings & Buttons Explained- What do all these buttons mean?
Many Instant Pot users are afraid to use the buttons on their cooker, so they just stick with the default settings. This is a huge mistake.
There are many different buttons and settings that will help you cook your food in less time, keep it moist, or even make boiled eggs without having to monitor them.
In this section, we’ll cover everything you need to know about instant pot buttons and settings.

What are Instant Pot Buttons and Settings?
Instant pot settings are what you use to control the cooking time, pressure level, and temperature.
The buttons change depending on which model of Instant Pot you have. It’s important to know which button to use and where each is located to get your food cooked correctly.
1. Cancel
The cancel button is a distinct operational button.
Depending on the model, the button is usually engraved in red or surrounded by a red marking. This button ends any cooking program once pressed.
It also resets the instant pot back to default settings from the factory once held down until you hear a beep.
2. Steam Button
It is used to set a timer for steam time. There are three modes for steaming- less (vegetables), normal (fish & seafood), and more (meat).
The default is usually “20 minutes” but this can be changed using the “+” and “-” buttons.
It is recommended to use the steam rack to place the item being steamed.
When steaming food prone to overcooking such as vegetables, use the quick pressure release system as opposed to natural release.
3. Delay Start
Used to start cooking at a later time. The key enables you to delay time before a specific cooking program begins.
To set up this function;
- Use the + / – buttons to set the hours
- Press Delay Start again
- Use the + / – buttons to set the minutes
Once you’ve set the time, the light indicator lights after 10 seconds, and the countdown begins. The food will start to cook when the countdown is complete.
There are certain foods that the Delay Start program is not recommended for such as oatmeal, porridge, foamy, and other thick liquids.
4. Sauté Button
The Saute setting is another non-pressure cooking function.
It also has three modes, normal (for regular browning), less (for simmering or thickening sauce), and more (for stir-frying or blackening meat).
It activates the heating element and allows you to adjust how hot it gets. The default temperature is “normal” but this can be changed by pressing the button repeatedly.
Unlike the other functions, use this button WITHOUT the lid for a maximum of 30 Minutes.
Check out: The Instant Pot Sous Vide Function: Everything You Should Know
5. Keep Warm
The keep warm feature switches the auto keep warm feature on and off. It is also a program that doesn’t involve pressure cooking.
When this function is on, any cooking program you set will automatically switch to keep warm, which is meant to keep food hot before serving.
6. Pressure Cook/Manual
Either of the two wordings indicates a similar function. This button allows you to set a specific cooking time and pressure level manually.
To operate this key, press the pressure level to adjust the pressure. When adjusting the cooking time, navigate between the + and – keys.
Note that the manual function is only available on certain Instant Pot Models. If you have an IP-Lux50 or Lux, you can use this function.
7. Slow Cook
It allows you to prepare meals at varied pressure for long periods just like how you would in an oven or crockpot.
There are three modes with this setting. Less (for a low setting), more (for a high setting), and normal (for a medium setting).
Moreover, you can use the glass lid or instant pot lid to slow cook.
The temperatures for the slow cooking range between 180-210°F depending on the mode.
Conclusion
The absence of the poultry button on your instant pot is not a cause for alarm. You can still prepare delicious and healthy chicken meals with your kitchen appliance.
As mentioned, you can prepare a whole chicken, pieces, canned and shredded. The idea is to stick to the recipe and monitor the meal while preparing it.
Depending on the model of the instant pot you have, you can prepare a variety of food while utilizing the different instant pot buttons and settings.


